Setting up Scrapebox to use ScraperAPI as a proxy is straightforward. Scrapebox generally recommends using multiple proxies to spread your scrapes across IP addresses and prevent bot detection, but when using ScraperAPI we do all that for you. So you only need to configure Scrapebox to use one proxy: ScraperAPI.
To configure Scrapebox to use ScraperAPI, you will need to have Scrapebox installed and you will need a ScraperAPI key which you can get by signing up here.
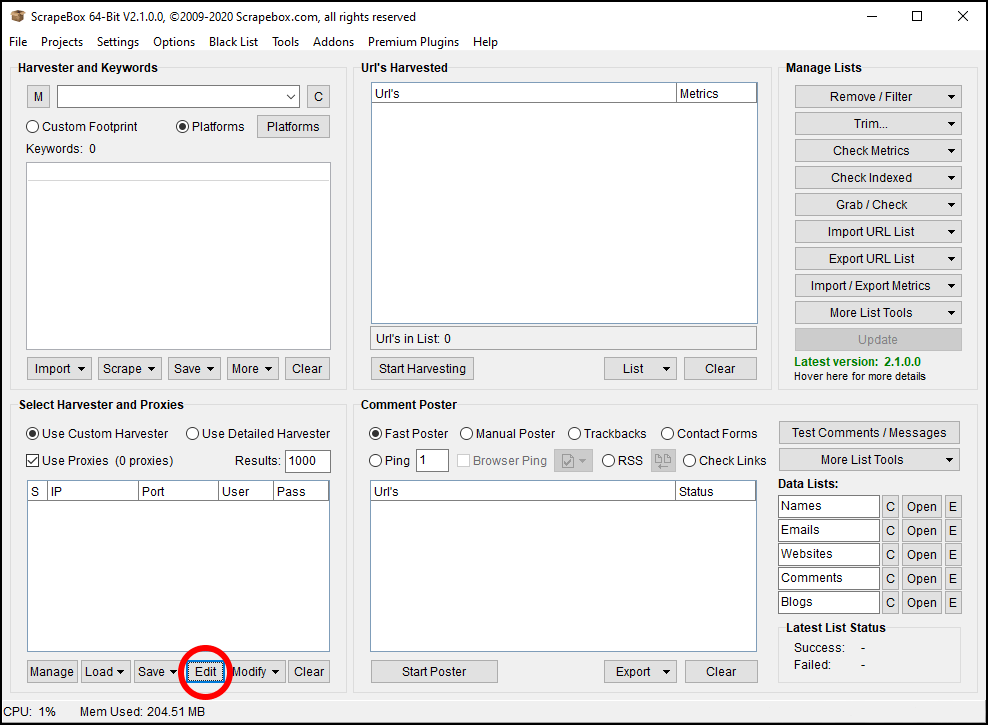
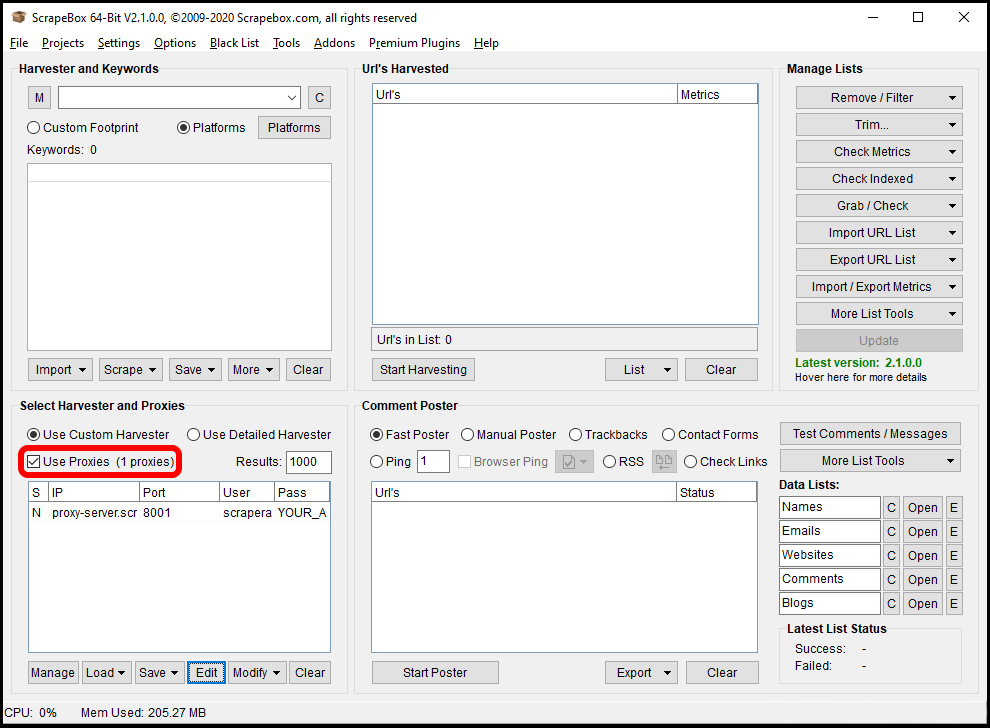
Start Scrapebox and once it’s loaded, click in the “Edit” button down in the bottom-left, in the “Select Harvester and Proxies” section.
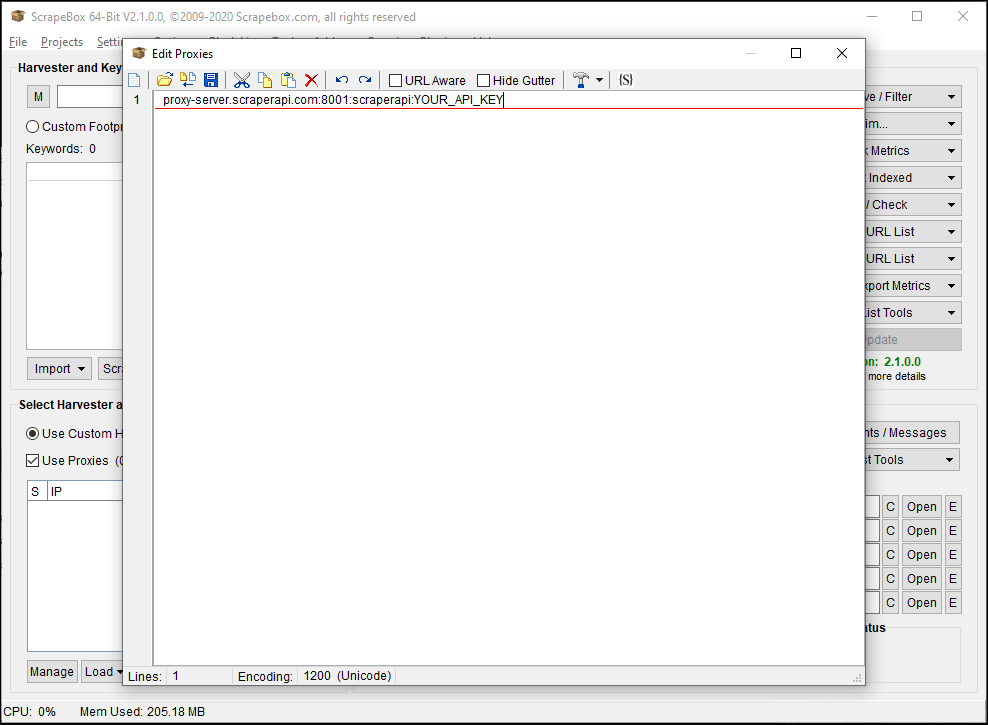
Scrapebox will open a text editor window you can use to enter ScraperAPI’s proxy details. Click on the first line and enter the following:
"proxy-server.scraperapi.com:8001:scraperapi:YOUR_API_KEY"
Don’t forget to replace “YOUR_API_KEY” with your API key, which you can get from the ScraperAPI website dashboard page, once you are logged in.
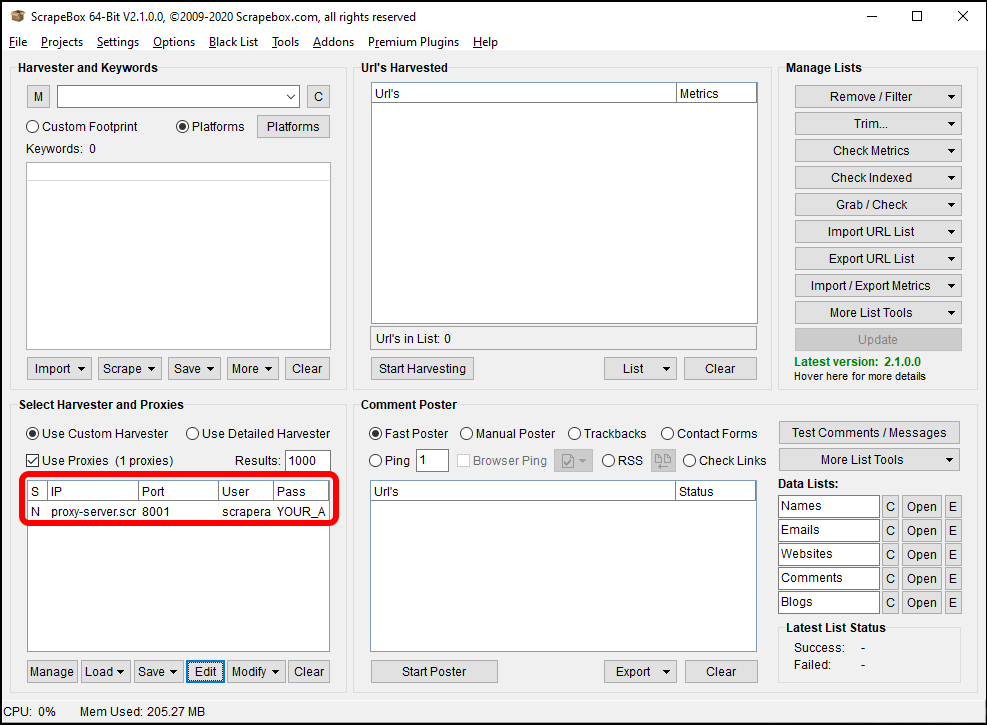
Click on the Disk (save) icon in the menu to save your new proxy list and close the editor. The proxy list on the main window will be updated to reflect your changes.
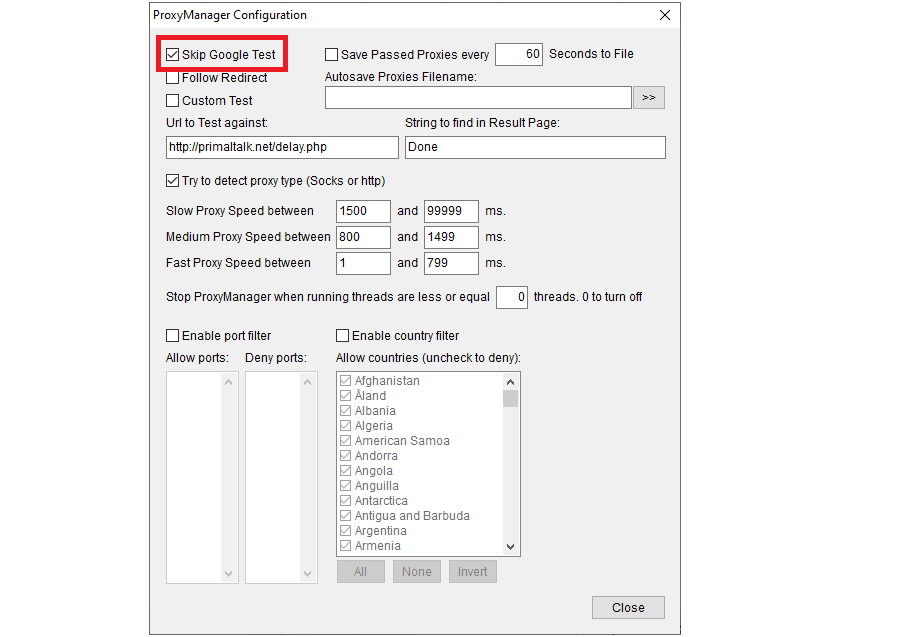
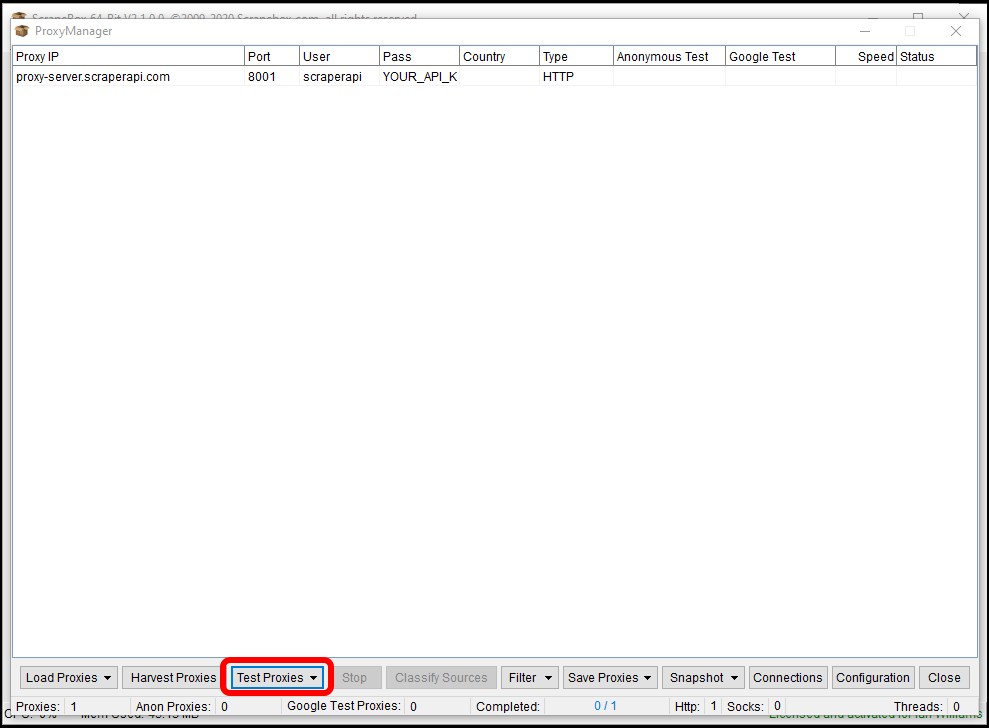
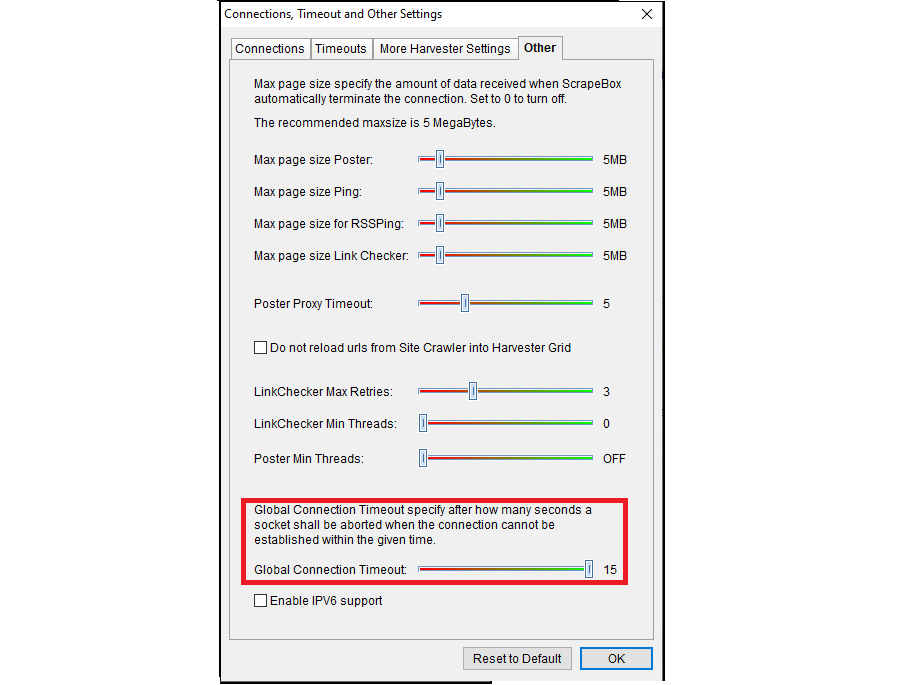
Scrapebox has a global configuration setting that times out connections after 10 seconds by default and 15 seconds maximum. As we prioritise success over performance and retry failed requests through different proxies, this can mean that testing the proxies can fail as the test can take longer than the connection timeout. If you do want to test the proxies there are instructions below, hwoever we recommend you turn off the Google test under Manage Proxies / Configuration. On the main screen, click on “Manage” at the bottom-left, then on “Configuration” on the bottom right of the next screen.
To test your connection to ScraperAPI, click on the “Manage” button at the bottom-left of the “Select Harvester and Proxies” section on the main window. This will open the Proxy Manager page.
Click on the “Test Proxies” button, then “Test all Proxies” to test your connection to ScraperAPI and make sure your connection details are correct. Once the tests have completed, you should see green “Passed” in each of the “Anonymous Test” and “Google Test” columns. If not, close the Proxy Manager window and re-check your proxy settings in the proxy text editor.
Once your proxy configuration has been saved, make sure you configure Scrapebox to use proxies by checking the “Use Proxies” box on the main window.
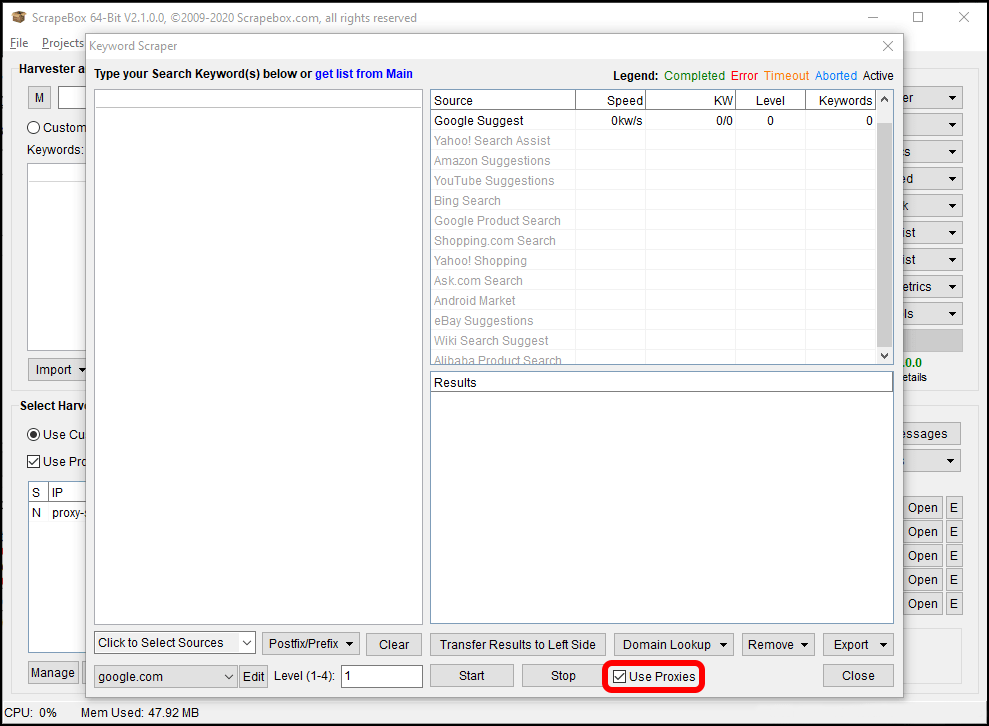
You can also use ScraperAPI in scrapebox’s keyword scraper. Click on the “Scrape” button just above “Select Harvester and Proxies”, then on “Keyword Scraper”. Check the “Use Proxies” box on the Keyword Scraper window to use ScraperAPI when getting keyword suggestions.
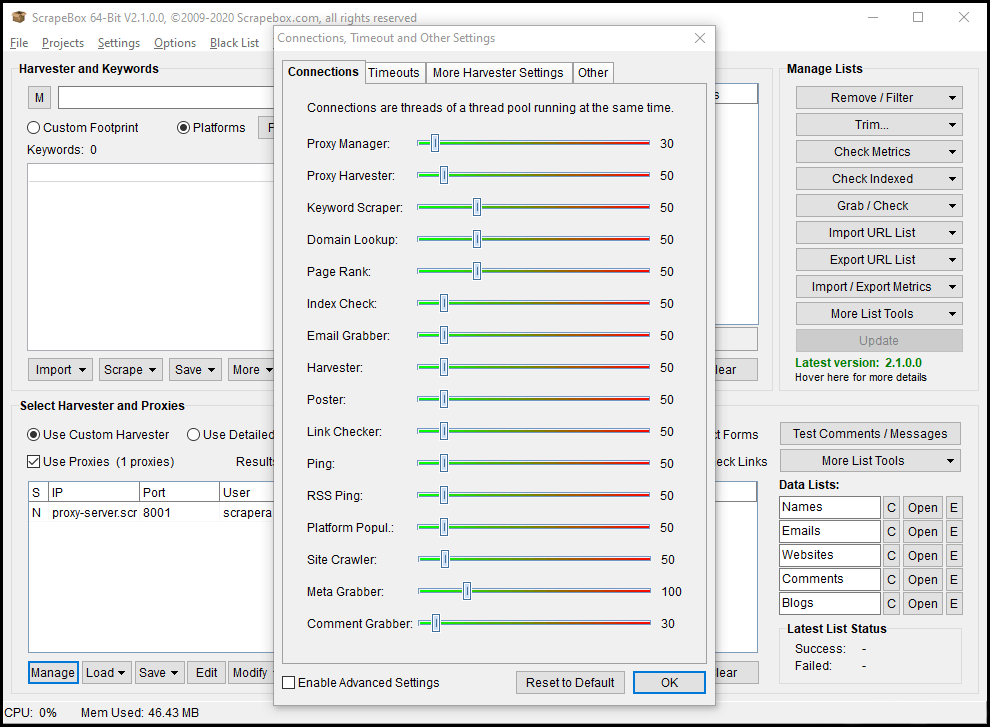
Lastly, Scrapebox allows you to configure the number of concurrent connections it uses when scraping as well as timeouts for responses and connections. Concurrent connections need to be in line with the number of concurrent requests that you have in your ScraperAPI plan and timeouts need to be set to give the API a chance to respond.
To configure Scrapebox’s connections, click on the “Settings” menu at the top of the main page, then on “Connections, Timeout and Other Settings”. Adjust the slider bars in the Connections window to match the concurrent requests limit for your plan. Note that nothing bad will happen if you don’t, Scrapebox will get some 429 responses from ScraperAPI and will retry its requests.
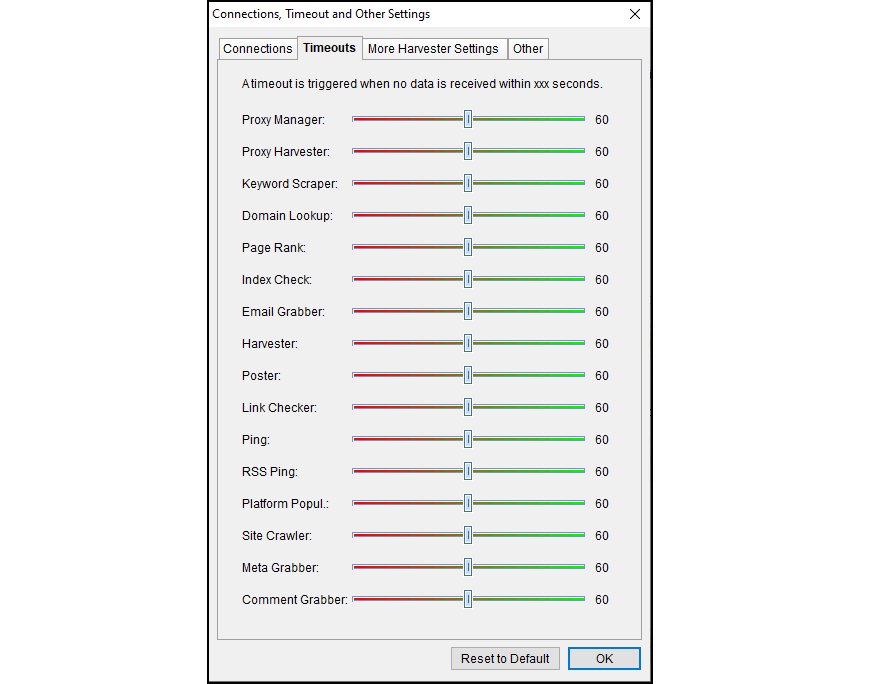
While you are on the “Connections, Timeout and Other Settings” window, click on the “Timeouts” tab and adjust all the sliders to at least 60 seconds. As we prioritise success over performance, this gives the API a chance to try different proxies if a request fails.
Now click on the “Other” tab and slide the “Global Connection Timeout” slider all the way to the right.
Click on the “OK” button to save your changes and start scraping!
